Hey everyone, it’s Jake here from your go-to Pool Spa Equipment supplier. If you’ve ever walked out to your backyard spa and noticed a random puddle by the equipment pad, or the water level is dropping faster than it should even with the cover on, you know the panic that sets in. A leaking spa isn’t just a hassle—wasteful water bills, strained pumps, and even structural damage are no joke. I’ve been working with spa and pool gear for 12 years, and I’ve fixed way more leaks than I can count on two hands, so today I’m breaking down how to actually troubleshoot and fix a spa leak yourself (no need to call a pro right away, though I’m here if you want to skip the DIY stuff later). Let’s dive in. Pool Spa Equipment
First, let’s get one thing straight: not all leaks are the same, and you can’t fix what you don’t find. I see guys every day grabbing sealant or a patch kit before even figuring out where the leak is, and that’s how you waste money on stuff that doesn’t work. Step one: do the “bucket test” to confirm it’s actually a leak. Grab a 5-gallon bucket, fill it with water from your spa until it’s about an inch below the top, then set it on the spa’s edge (make sure it’s stable—no tipping!) and mark the water level inside the bucket. Wait 24 hours. If the spa level drops more than the bucket’s level, you’ve got a real leak, not just evaporation. That’s the first win, trust me. I’ve talked so many new spa owners off the ledge who thought their spa was broken, turns out it’s just hot water evaporating fast in dry summer air. The bucket test eliminates that guesswork.
Okay, so you confirmed a leak. Now let’s narrow down where it’s coming from. The most common spots? Outside leaks (where water escapes the spa and onto the ground) vs. inside leaks (where water is getting into something it shouldn’t, like the equipment, which is way more dangerous). Let’s start with the easy, obvious ones first—those are the fixes that take 10 minutes and save you a huge headache.
First, check the spa’s jets. I can’t tell you how many times I’ve replaced a jet gasket or a loose jet and the leak is gone. Jets are the little round nozzles you twist to adjust the flow, right? Over time, those gaskets (the soft rubber ring that sits between the jet and the spa’s shell) get worn out from chemicals, heat, and just being messed with when you clean the jets. Let’s check: grab a small rag or paper towel, dry the area around each jet, then turn on the spa’s pump for 5 minutes. If water is seeping out around the base of a jet, that’s your culprit. Fixing this is super easy—just turn off the power to the spa first (safety first, people!), twist the old jet counterclockwise to pull it out, pop the old gasket off, and slip on a new one (make sure you get the right size—most standard jets use a 2-inch or 1.5-inch gasket, and I stock these at the shop, no need to buy generic that won’t fit). Push the jet back in and twist it clockwise until it’s tight, then turn the power back on and check. 9 times out of 10, that fixes the leak. I had a customer last month who called saying her spa was dropping 2 inches a day, turns out a jet gasket had cracked from chlorine, and we fixed it in 5 minutes. No tools even needed, just the new gasket.
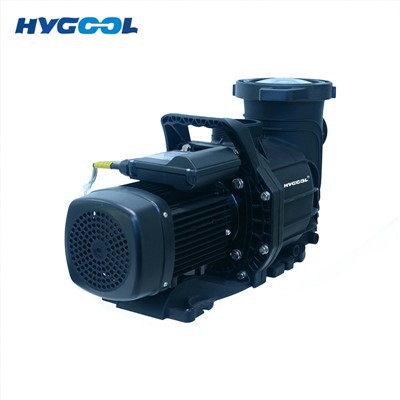
Another super common outside leak: loose or cracked pipe fittings in the equipment pad. That’s the area where your pump, filter, and heater sit, usually right next to the spa. Most spas have PVC pipes running from the pump to the jets, and those can come loose or crack from freezing temperatures (if you winterize your spa wrong) or just from the constant vibration of the pump running 24/7. To check this: again, turn off the power to the spa (seriously, don’t skip this—wet hands + electricity = bad news), then dry all the pipes around the fittings and look for wet spots. If you see a small puddle coming from a joint, that’s a loose fitting. You’ll need a few tools here: a pipe wrench, some Teflon tape, and maybe a small pipe cutter if the pipe is cracked. First, turn off the valves on either side of the fitting (the ones that shut off water to the equipment), then drain a little water from the pipe by loosening the fitting slowly. Take the pipe apart, wipe off the old Teflon tape, wrap the new tape around the threads 3 or 4 times (clockwise, so when you screw it back on the tape doesn’t unravel), then tighten the fitting back up with the wrench—don’t over-tighten, that can crack the PVC. If the pipe is cracked, you’ll need to cut out the damaged section, glue in a new piece of PVC, and let it cure for an hour before turning the water back on. I always tell my customers to keep a spare length of PVC and glue in their equipment pad, because you never know when a pipe will split.
Now, if you checked jets and pipe fittings and still have a leak, it’s probably inside the spa shell, which is a little trickier. That’s when water is seeping through the shell itself, not just around a part. First, rule out the filter. Wait—your spa filter catches all the gunk, but if it’s cracked or the O-ring is bad, that can cause a leak too, believe it or not. Remove the filter, inspect it for cracks, tears, or if it’s just too old (most filters need replacement every 1-2 years). Also, check the O-ring that seals the filter inside the filter housing—if it’s dried out or has a tear, that can let water escape. Replace the O-ring if it looks off, and if that doesn’t work, try a new filter. I’ve had customers buy $500 leak detection services just because their $20 filter was cracked. Don’t be that guy.
If the filter’s good, let’s move on to the spa shell itself. The most common shell leaks are from small cracks, usually around the edge of the spa (where the shell meets the deck) or from a worn seal around the skimmer (that’s the bigger opening that sucks water into the pump, right?). To test for shell leaks: once you’ve done the bucket test and confirmed a leak, turn off the spa pump and let it sit for 12 hours. If the water level drops, that’s definitely a shell leak, not something in the equipment. Now, how to find the crack. Grab a garden hose, turn the pressure down low, and spray water all over the spa’s shell—start at the bottom, then work your way up. When you see water seeping into the spa, that’s where the crack is. Wait, or if you have a dye test kit—those are cheap, I sell them for $10 at the shop—you can squirt the dye around the edges and it will get pulled into the crack. Way easier than spraying with a hose for big spas.
Once you find the crack, you need to fix it with a spa-specific epoxy or patch kit—don’t use regular glue, that stuff won’t hold up to the chemicals and heat in a spa. First, drain the area around the crack, clean it really well with rubbing alcohol to get rid of any oils or chemicals, then let it dry completely (maybe leave the cover off for an hour if it’s warm outside). Mix the epoxy according to the instructions (it sets fast, so don’t mix more than you need), spread it over the crack, and smooth it out with a putty knife. If it’s a bigger crack, you can press a piece of fiberglass mesh (included in most patch kits) into the epoxy for extra strength. Let it cure for at least 24 hours before filling the spa back up, and test it with the bucket test again to make sure it’s fixed. I once had a crack from a patio furniture leg that had been sitting on the spa for months—customer didn’t even know it was there until she did the bucket test, and we fixed it with a patch kit in 15 minutes.
Now, what about inside leaks—those are the scary ones. That’s when water is getting into the pump, heater, or control box, which can ruin expensive equipment. How do you spot that? If the water level is fine, but there’s water pooling in the equipment pad or you notice the pump is making weird noises, or the heater won’t turn on. That’s a bad sign—you should turn off the power to the spa immediately and call a pro if you don’t have experience working with electrical components and water. Inside leaks can be from a bad seal on the pump’s impeller, or a cracked heater exchanger, and those require more specialized tools and parts. I always tell my customers that if the leak is coming from inside the equipment, it’s not worth DIY-ing—one wrong move and you can fry your pump or even get hurt.
Wait, let’s go over a few common mistakes I see people make that turn a small fix into a big job. First, using pool sealant on a spa. Spa water is way hotter than pool water, and has different chemicals—pool sealant will melt or peel off in a month. Second, over-tightening fittings. I’ve seen people crack PVC pipes because they used a wrench and put way too much force—hand-tight plus a quarter turn is enough, trust me. Third, not turning off the power before working on anything. I can’t stress that enough—last year we had a customer who got shocked when he tried to fix a pipe, and he was lucky it wasn’t worse. Safety first, always.
Now, if you tried all these steps and still can’t find or fix the leak, that’s when I step in. At our shop, we do leak detection services—we use pressure testing and acoustic tools to find even the smallest leaks in pipes and shells, no guesswork. We also carry every part you could need: jet gaskets, PVC pipes, epoxy, filters, O-rings—all the stuff I mentioned today, at prices that won’t break the bank. A lot of people wait too long to fix a leak, and end up having to replace their entire pump or spa shell, which is way more expensive than fixing the leak early.
If you’re in the market for replacement parts, or you need help troubleshooting a leak that’s driving you crazy, hit us up. We’re here for all your pool and spa gear needs, from small parts to big equipment. Don’t let a little leak ruin your summer—let’s get your spa back up and running so you can relax in the hot water again.
Wait, one last tip for preventing leaks in the first place. Every 6 months, do a quick check of your jets, fittings, and filter. Replace gaskets and O-rings before they wear out, keep your chemicals balanced (too much chlorine eats at gaskets and shells), and if you winterize your spa, make sure you drain all the water from the pipes to prevent freezing and cracking. That saves you so much trouble down the line.

Okay, that’s all for today. If you have any questions, or if you need parts or a leak check, reach out to our team. We’re always happy to help fellow spa owners avoid the headache of a leaking spa. Now go check your bucket test—your backyard spa is waiting.
Sauna Room References:
- National Spa and Pool Institute. (2021). Residential Spa Maintenance Guide.
- American Chemistry Council. (2020). Chemical Compatibility for Spa and Pool Equipment.
- Pool & Hot Tub Alliance. (2022). Leak Detection and Repair Best Practices.
- U.S. Consumer Product Safety Commission. (2019). Electrical Safety for Pool and Spa Owners.
Guangzhou Qiaoyi Water Treatment Technology Co., Ltd.
Address: Floor 6th, Building 2, No. 3, Ketai 1st Road, Baiyun District, Guangzhou 510445, Guangdong Province, China
E-mail: Hygool@hygool.com
WebSite: https://www.hygool.com/
